HomeGuidesRecipesAPI ExplorerForumSupport
Partner Portal
Partner Portal

React SDK quick start

Get started with Monite's React UI SDK.

This quick start shows how to set up and utilize Monite's React UI SDK in your React or Next.js applications.

Before you begin

To follow this quickstart guide, ensure you have retrieved your credentials from the Monite partner portal. For more information, see Get your credentials.

1. Installation

To install the Monite React UI SDK:

npm install @monite/sdk-react @monite/sdk-api
yarn add @monite/sdk-react

2. Authentication

Define your fetchToken function to retrieve your access tokens.

const fetchToken = async () => {
  const response = await fetch(
    "https://api.sandbox.monite.com/v1/auth/token",
    {
      method: "POST",
      headers: {
        "Content-Type": "application/json",
        "x-monite-version": "2024-01-31",
      },
      // TODO: Replace the following fields with your Monite credentials
      body: JSON.stringify({
        grant_type: "entity_user",
        entity_user_id: "ENTITY_USER_ID",
        client_id: "CLIENT_ID",
        client_secret: "CLIENT_SECRET",
      }),
    }
  );

  return response.json();
};

3. Initialization

To initialize the Monite React UI SDK, import the MoniteSDK object instance from the package and initialize as shown:

import { MoniteSDK } from "@monite/sdk-api";
import { useMemo } from "react";

const monite = useMemo(
  () =>
    new MoniteSDK({
      apiUrl: "https://api.sandbox.monite.com/v1",
      entityId: "ENTITY_ID",
      fetchToken: fetchToken,
    }),
  []
);

4. The MoniteProvider wrapper

The MoniteProvider wrapper is a helper component that wraps all other Monite React UI components. Import and utilize in the MoniteProvider wrapper as shown:

import { MoniteProvider } from "@monite/sdk-react";
// import CounterpartModal from "./CounterpartModal"

function App() {
  return (
    <div className="App">
      <MoniteProvider monite={monite} locale={{ currencyLocale: "de" }}>
       // <CounterpartModal />
        ...
      </MoniteProvider>
    </div>
  );
}

export default App;

The monite prop holds the object obtained from initializing the MoniteSDK.

5. Create a counterpart

The CounterpartDetails component is used to create a new counterpart. When provided with the type prop, the component renders a modal for creating counterparts of type individual or organization. To create a counterpart, import and render the CounterpartDetails component as shown:
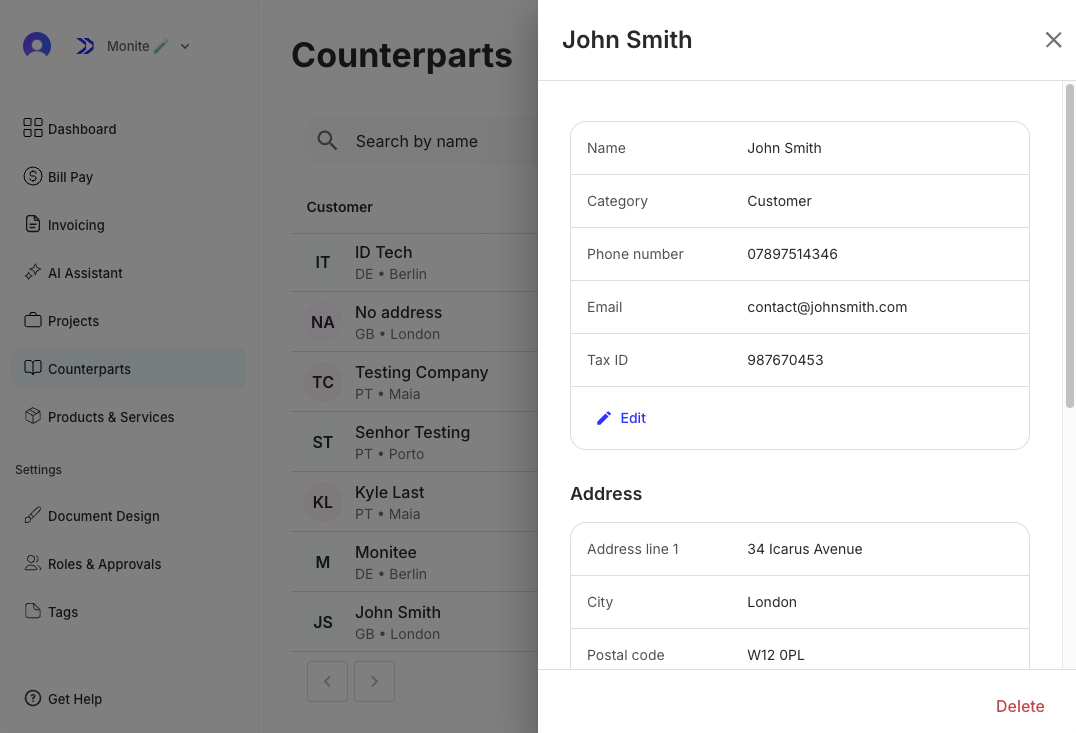
import { CounterpartDetails, Dialog } from "@monite/sdk-react";

function CounterpartModal() {
  return (
    <div className="counterparts-modal">
      <Dialog open alignDialog="right">
        // `type` value could be `individual` or `organization`
        <CounterpartDetails type="organization" />
      </Dialog>
    </div>
  );
}

export default CounterpartModal;
 CounterpartDetails component with the type prop provided.

CounterpartDetails component with the type prop provided.

6. View counterpart details

To view counterpart details, use the CounterpartDetails component and provide the counterpart ID to the id prop as shown:

import { CounterpartDetails, Dialog } from "@monite/sdk-react";

function CounterpartModal() {
  return (
    <div className="counterparts-modal">
      <Dialog open alignDialog="right">
        <CounterpartDetails id="COUNTERPART_ID" />
      </Dialog>
    </div>
  );
}

export default CounterpartModal;
`CounterpartDetails` component with counterpart ID provided

CounterpartDetails component with counterpart ID provided.

For more information on Monite's React UI components, see React UI components.

Next steps

By completing this quickstart, you have learned how to:

  • Install and initialize Monite React UI SDK package.
  • Create a counterpart using the CounterpartDetails component.
  • View counterpart details using the CounterpartDetails component.

Next, you can generate and issue receivable to the counterpart via the Monite React UI SDK. For more information on the Monite React UI SDK, see React UI components.